Before I even purchased a kayak, the only "research" I did, was watching an episode of "Hank Parker Outdoors" where he fished out a Hobie Outback on a small backcountry pond. Hank noted that it was fairly inexpensive, but once get past the initial cost of buying one, that you could literally go anyplace you wanted and launch anywhere because it was so small.
Fast forward to the present, I had bought a Hook 5 DSI Sonar/GPS/Fishfinder unit last year, then spent the winter months installing it, and finally got a chance to use this Spring. I was immediately impressed with the color features, since my last unit was a Eagle Cuda 350 S/Map (black/white Sonar/GPS), which was very basic compared to today's newer fish seeking units.
Anyway, I finally got a unit that had the DSI feature. DSI, aka "Down Scan Imaging", allows for a better 3D view of the ocean floor. So, during the Spring cinder worm emergence in Newport, I was constantly switching from screen to screen wondering why the Down Scan Imaging feature wasn't working properly. I finally found a screen that I could read, but I was still irked at the DSI issue.
The next day on Facebook, I had asked a fellow Hobie owner (and good friend), why the DSI feature wasn't working properly. He said in order for that feature to work, the transducer unit has to be in the water.
I mentioned that my Hobie doesn't have that fancy transducer plate in the bottom of the hull. He said it could be mounted externally on an arm.
I stopped in at Three Belles Outfitters in Niantic,CT to ask Shawn Pagano (Repairs Manager) about an external transducer mount for my older Hobie. He showed me the accessories that Yak Attack now makes for kayaks that don't an transducer plate.
So, here's what I picked up:
( 1 ) Yak Attack Switchblade Transducer Arm

Photo #1 Credit: Jeff Hall
( 1 ) Yak Attack Gear Track - Top Loading #GTTL 109

Photo #2 Credit: Jeff Hall
I will admit that I thought the directions for the installation were pretty vague, but the illustration on the instruction pamphlet gives you an idea on what it's supposed to look like.

Photo #3 Credit: Jeff Hall
Before I start anything, I wanted to make an "plate" for the gear track to give it a better grip on the kayak's surface. I have lots of scrap plate aluminum from the beat up road signs that I bought at a local flea market. I cut a small piece of plate making it a quarter inch bigger than the gear track.

One of many road signs that I got at a local flea market for $10 each.
Photo #4 Credit: Jeff Hall

I used a high speed drill with a grinding disc to take off the sharp edges on this backing plate I made.
Photo #5 Credit: Jeff Hall
While the above photo already shows the plate with the holes in it, the next photo will show you how I drilled all the holes perfectly with each one aligned properly.

In the photo above, I used an adjustable locking clamp to hold the gear track on top of the backing plate. Then, I drilled all three holes into the plate so everything is aligned up.
Photo Credit #6: Jeff Hall

I chose a spot on the left, just in front of the left rod holder, to place my gear track. I wore a pair of mechanical gloves and held the gear track in place while I drilled the holes for the bolts. After the first hole was drilled, I put a bolt in place to hold it steady. I did the same for the other two holes.
Photo #7 Credit: Jeff Hall

Before I mount the gear track, I placed a small O-ring on each bolt before attaching the backing plate. The bolts are placed thru the track and the O-rings are on the bottom of the track. When the bolts are placed into holes, the O-rings will provide a waterproof barrier between the outer hull and the hull's interior.
Photo #8 Credit: Jeff Hall


* Note for Hobie owners: When you go to attach the backing plate, be very careful you don't get the rudder line caught on the plate. This part will be tricky.
If you don't own a Hobie, then you won't have to worry about this part.
Photos #9 & #10 Credit: Jeff Hall

In the photo above, I installed the arm lock onto the track and tightened the knob at the bottom. Next, I inserted the arm into the arm lock and adjusted the tightness of the lock. The arm is snug, but not too tight that I can't move the arm up and out of the way. The grooves on the arm allow it to be locked onto the arm lock to prevent it from slipping out.
Photo#11 Credit: Jeff Hall

Starting at the base of the arm, I connected the transducer to the arm, and secured the cable to the front of the arm using the black cable ties provided. I used an extra cable tie (white) to keep the cable tight against the arm.

Photos #12 & 13 Credit: Jeff Hall
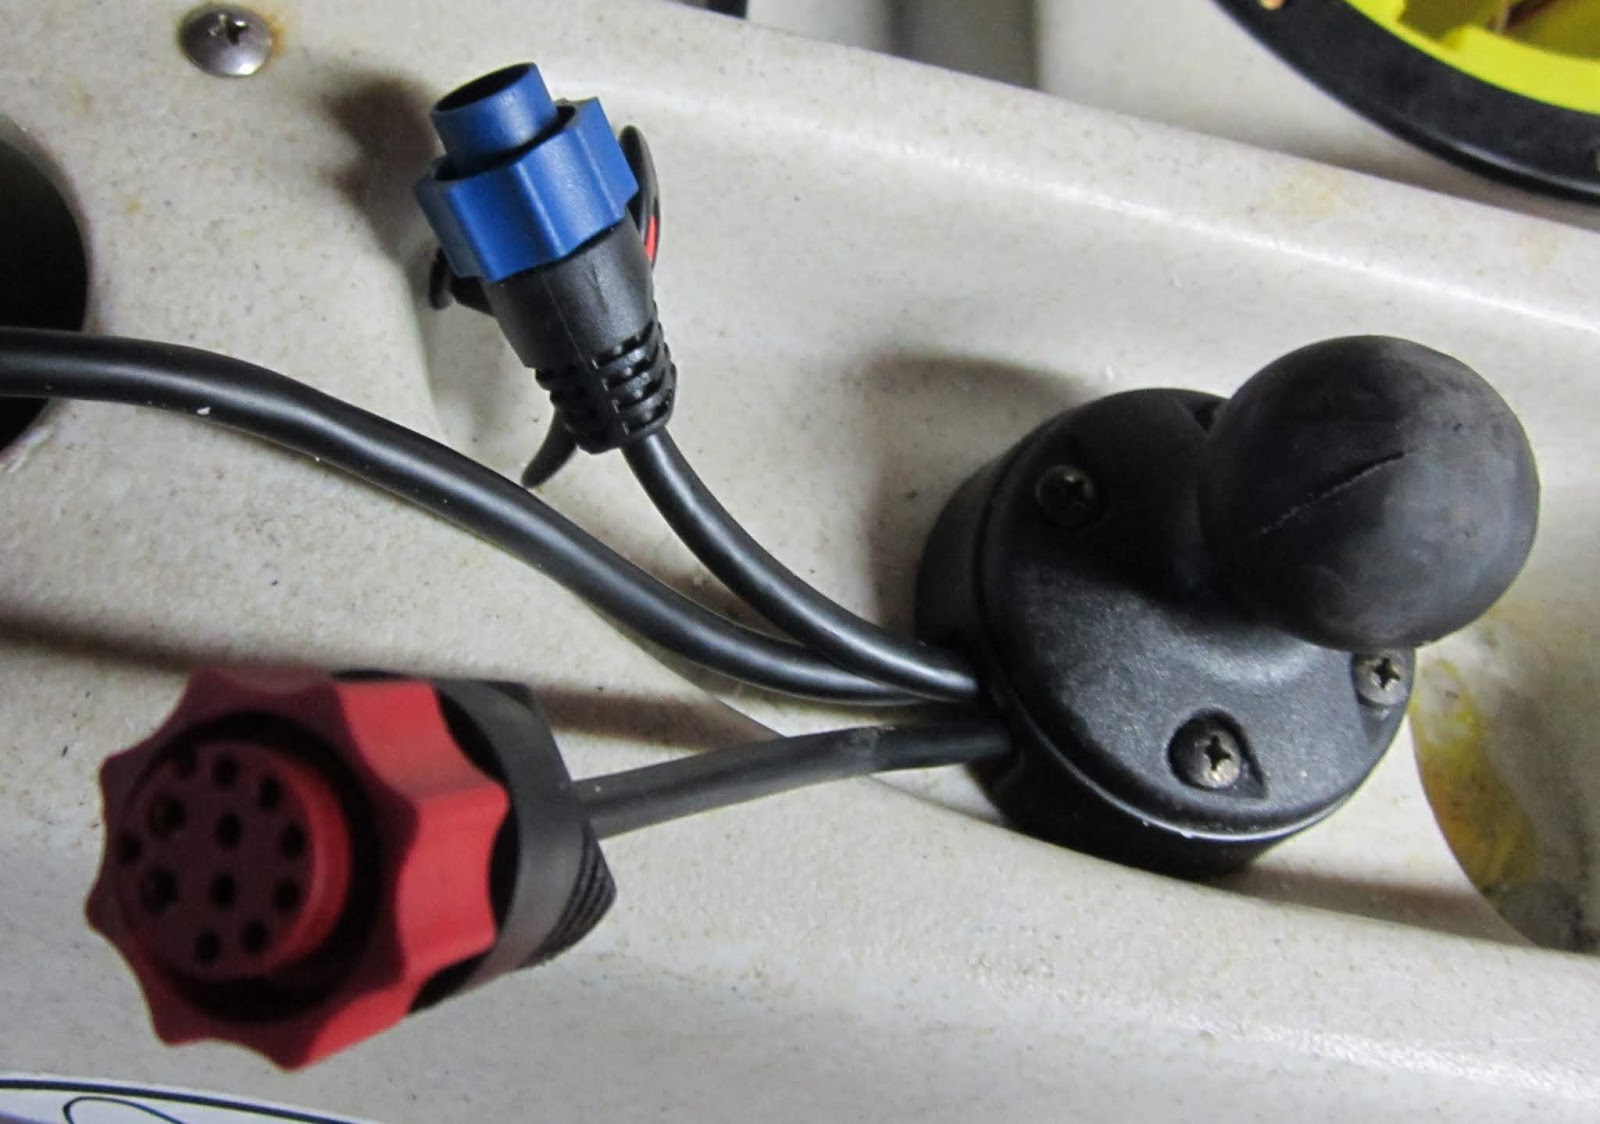
I found a good spot on my Hobie for the location of the Hook 5 by mounting it in the left storage tray, in front of the cup holder, but also 2" behind the rudder raise T-handle. I drilled a hole using a 1" diameter spade bit (save the shavings) so I can get the plug ends through. You may have to use a round file to slightly enlarge the hole's opening because the cable ends are over-sized.
I fed the Blue cable in first, and then pushed the Blue plug back out. I used a piece of velcro to wrap up the excess blue cable. Going in through the center hatch of the Hobie, I fed the Red plug through the hole's opening, and left the remainder of the Red cable's wire in the hull, as it is powered by a small 12 volt battery inside the hull. Next, I adjusted the cable manager and proceeded to drill the holes for the RAM Mount base. Then, I tightened up the 4 bolts with the nuts provided.
* Note: I used a RAM Mount "Cable Manager" to allow the cables to get in & out of the hull. The cable manager is roughly a 1/2" thick puck with a hole cut on one edge to allow the 1.25" diameter "Extreme Duty" RAM ball mount to be mounted on top of the cables. The holes for the ball mount's base will align with pre-drilled holes on the cable manager.
Photo #14 Credit: Jeff Hall
When finished, this is what the transducer arm looks like.

From the front, I wanted the arm to hang as far as it will go. The installation manual gives you the option of omitting one of the arms to make it smaller. But, I chose to keep the arm long, because I fish in saltwater. It still folds up and out of the way when beaching it, as well as transporting.

The Hobie sits on top of my second kayak, a 2013 Feelfree Moken 14. This angle shows you how far down the arm will actually reach. With this new method, I can now get the correct water temperature, and best of all, use the 3D qualities of the Down Scan Imaging system.
Photos #15 & #16 Credit: Jeff Hall
Hope this helps you in your decision to add a transducer arm for your fish finder whether it's a Sit-On-Top kayak, or a sit-inside kayak, it's time to unlock those secrets down below!
As usual, keep those lines wet & tight! - J
No comments:
Post a Comment