Friday, August 31, 2018

Camp Cronin Fishing Area - Narragansett, Rhode Island

    During the salt show every Spring, I get questions about "Where's your favorite fishing area and/or spot?", and one of my responses is, "...the Camp Cronin Fishing Area located in Narragansett, RI.".

    When I was a kid, my Dad used to take me fishing in Rhode Island a lot, usually in Westerly,RI next to an old lighthouse that was manned by the Coast Guard. But in recent years, the Coast Guard made the lighthouse unmanned, and sold the property to a private owner - who then cut off access to the point (a locally known hot spot for striped bass and bluefish). I heard rumors that the owner didn't want anybody out there carving up their catch, and leaving the remains everywhere for seagulls to eat & crap everywhere.

    When I tried to find out more information about "Camp Cronin" itself, to give you, the reader some type of background on this hot spot, I came to many "dead ends". There is literally no information containing the words "Camp Cronin", whether it was a former military encampment, installation, base, etc.. So, I did some research on past military forts of World War II, and I came across this web page on NorthAmericanForts.com , about "Fort Nathaniel Greene (2) aka Battery 211".

This is what I found out:

Fort Nathaniel Greene (2)* 
(The Point Judith Fishermen's Memorial)
(1934 - 1948/present), Point Judith
Originally named Point Judith Reservation until 1941. Fort Greene is divided into three separate sections. The East Reservation has Battery Hamilton / 108 (1943 - 1948). The RI National Guard still uses this parcel as a training area.

The West Reservation has Battery 109 (1944). The present is named "The Fishermen's Memorial State Park" which uses this parcel as a campground, as well as most of the former southern parcel. The park office incorporates a former battery command - fire-control tower/silo (Photo 1). The South Reservation* has Battery 211* (1945 - 1948) at the water's edge, and an unnamed four-gun 155mm battery on Panama mounts - two are mostly buried under the beach, the other two were washed away from Hurricane Sandy. "The Point Judith Fishermen's Memorial" is located at Battery 211* (which is buried under the Fishermen's Memorial itself). Three fire-control stations were once located near here at the present Camp Cronin Recreation Area, disguised to resemble typical New England style beach houses. One still remains.
(Not to be confused with Fort Greene (1) in Newport)


Fort Greene Fire Watch Tower


Fort Greene Fire Watch Tower is now part of the Main Office for the "Fisherman's Memorial State Park"


Fort Greene Fire Control Building - the building is in an advanced state of decay, and the property is currently owned by the city of Providence,RI.

To learn more about Fort Greene [2], click the link.

Photo #'s 1, 2, & 3 Credits: John Stanton & Bill Thayer


Photo #4 Credit: Chris Zeeman


Photo #5 Credit: Chris Zeeman

For more info, Click here: Battery 109


    *Author's Note: I made some changes to this article here to clear up some confusion. "The Point Judith Fishermen's Memorial" is located here, and is NOT to be confused with the "The Fishermen's Memorial State Park", which is now a campground for RVs & Motorhomes located a few miles away. Click the link for a dark secret about RI's participation in World War II!

    Anyway, I've always enjoyed searching for new places to launch my kayak, and get out on the open water. And, this place doesn't disappoint! I will extend some caution though, I would classify this particular spot as an "advanced/experienced-only" launch spot. Most people wouldn't venture out past the break on the East wall. I would leave that up to the more advanced kayak anglers in our group. Trust me, you REALLY have to keep your eye on the tidal currents by the Red Buoy Marker on your left coming out of the East wall! Between the currents coming at you from the East, South, and North (out of the Harbor of Refuge) and the big sport fishing boats leaving Point Judith Harbor, you will have your hands full as you try to navigate your kayak to your favorite hunting grounds East of Point Judith Lighthouse.


Camp Cronin in it's earlier years. In this photo, the Pt. Judith Fisherman's Memorial didn't exist.

Photo #6 Credit: KayakAccess.info


Photo #7 Credit: YankeeMagazine.com


Visitors walk along the top of the East wall at sunset.

Photo #8 Credit: HiveMiner.com


The sun sets behind the info board at the Camp Cronin Fishing Area.

Photo #9 Credit: NewEngland.com


Photo #10 Credit: NewEngland.com


Beachgoers take in the midday sunshine behind the East wall at the Point Judith Back Beach at Camp Cronin. This stretch of deep sand will require your kayak's cart be equipped with beach tires (aka balloon tires). It will make your trek across the sand a lot easier.

Photo #11 Credit: HiveMiner.com


A commercial fishing vessel makes its way back to Point Judith Harbor, via cutting through the Harbor of Refuge at high tide, to unload its daily catch. Those of us that choose to fish the East break wall, may have to dress appropriately, for the incoming high tide could cause you to go home soggy. 

Photo #12 Credit: HiveMiner.com


RISAA Kayak Committee members Anthony & Stephanie Caruolo prepping their gear for an afternoon launch. Both Anthony & Stephanie caught several fluke by staying inside the channel next to the green tower at the other break's end.

Photo #13 Credit: Mona Rodriguez


RISAA Kayak Committee members Jeff Hall (left) and Gino DeFeudis (right) discuss their options on where to fish.

Photo #14 Credit: Mona Rodriguez


Jeff & Gino launching (in the slack tide) during the high tide.

Photo #15 Credit: Mona Rodriguez 


Jeff sets up his Hook 5 fishfinder, while Gino checks all the hatches making sure everything is secure.

Photo #16 Credit: Mona Rodriguez


While these photos above were taken in August, on a relatively calm and perfect day, it's hard to believe that anything could wrong. But in 2012, one of the state's most destructive hurricane's, "Hurricane Sandy" (aka Superstorm Sandy) slammed into the Rhode Island coast with such force that it literally decimated the parking area, the fisherman's memorial, and the barrier wall protecting the Harbor of Refuge. The RIDEM (Rhode Island Dept. of Environmental Management) applied for federal grants to aid in rebuilding the parking area, the memorial, and the East wall/coastline.


The waves from the hurricane were so destructive that it picked up large boulders, some as big as a small compact car, and strewn them all over the parking area. Here, local residents survey the damage caused by Hurricane Sandy.

Photo #17 Credit: RIstripedbass.blogspot.com


During the rebuilding process, a drone cam captures the construction crews carefully arranging the large stones into a better built wall, making sure the coastline is better protected from future disasters.

Photo #18 Credit: DredgingToday.com


The Point Judith Fisherman's Memorial now sits next the Overlook, where this photo was taken, and to the left of the parking area. The "overlook" is actually the remains of the Radio Room that was built in 1944. Rather than demolishing it, the state of RI chose to "bury it" under a mound of dirt. The entrances in the front & back of the structure were blocked off with huge stones to prohibit entry into the structure, but a few brave souls managed to wriggle their way in and spray graffiti on the walls.

Photo #19 Credit: FlickrHiveMind.net


Photo #20 Credit: John Stanton


This is the rear entrance of the radio room, which faces the shore, but is blocked off with large boulders to prevent entry into the structure.

Photo #21 Credit: Jeff Hall


Before Hurricane Sandy came, this structure was one of two battery gun emplacements that protected Point Judith from enemy attacks.

Photo #22 Credit: John Stanton


Both this photo, and the one above, were taken before Hurricane Sandy. A combination of rising sea levels and stronger storms, have worked together to erode the large concrete plates around the turret tower base, and wash them out to sea. Slowly erasing Rhode Island's participation in World War II's history.

Photo #23 Credit: Chris Zeeman


This photo was taken recently in January 2017. 

Photo #24 Credit: Jeff Hall


This is the second turret base that sits to the right of the radio room. It sits a little further back than the other base.

Photo #25 Credit: Chris Zeeman
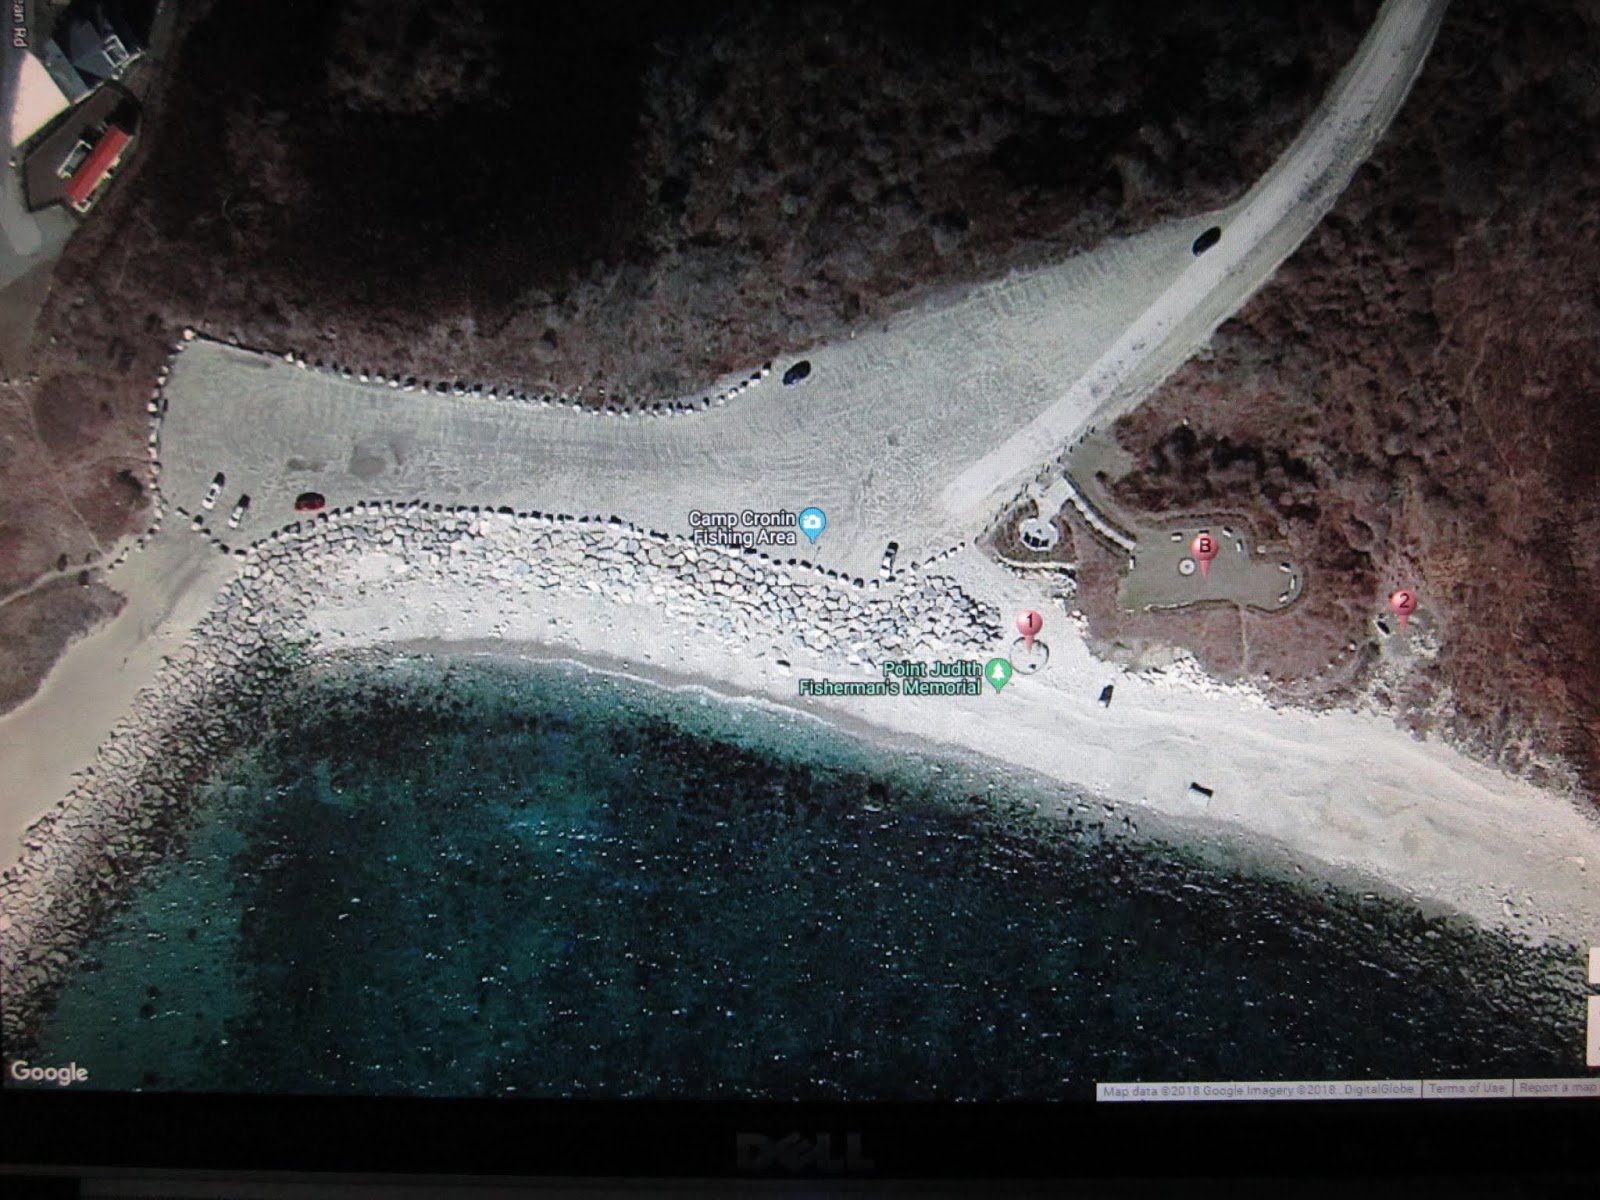


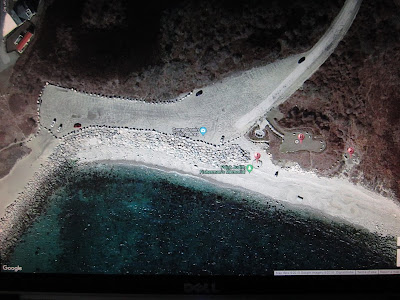
Today, this is the new and improved Camp Cronin Fishing Area parking lot. The two white cars on the far left, is where you would put in the kayaks - provided you have a kayak cart that handle deep sand. The large rocks at this entry point are wide enough to get your kayak through and down to the shoreline on the inside of the East barrier wall.

Photo #26 Credit: Jeff Hall via Google Maps


The stretch of sand that leads down to the protected area to launch is roughly 200 feet long (longer if it's low tide). If you don't have flotation tires, you are going to regret it, as dragging a fully loaded kayak will feel like you're dragging it without tires. There is no way to drive down to launch. It's not a well used launch point, because of the distance & the deep sand involved. When night falls, the action heats up for both surfcasters and kayak fishermen when the fish change direction. This will be a hot spot for years to come as it leads out to the open waters with views of Block Island a short distance away.

Photo #27 Credit: Jeff Hall via Google Maps


As usual, keep those lines wet & tight! - J


*Author's Note: I would like to thank all those involved with the making of this article. Without your photos, this article would've been a lot shorter. Don't forget to click the links and visit the photographer's pages as well.


Photo #28 Credit: Yelp.com


Photo #29 Credit: Elevation.Maplogs.com


Photo #30 Credit: MichaelBlanchette.com


Sunday, July 29, 2018

Adding an External Transducer Arm on your Kayak

    Back in September of 2009, I bought my first kayak, a Hobie Mirage Outback. It was stock with 4 molded in rod holders, a large tank well area behind the seat, and a huge storage area up front.
    Before I even purchased a kayak, the only "research" I did, was watching an episode of "Hank Parker Outdoors" where he fished out a Hobie Outback on a small backcountry pond. Hank noted that it was fairly inexpensive, but once get past the initial cost of buying one, that you could literally go anyplace you wanted and launch anywhere because it was so small.

    Fast forward to the present, I had bought a Hook 5 DSI Sonar/GPS/Fishfinder unit last year, then spent the winter months installing it, and finally got a chance to use this Spring. I was immediately impressed with the color features, since my last unit was a Eagle Cuda 350 S/Map (black/white Sonar/GPS), which was very basic compared to today's newer fish seeking units.
    Anyway, I finally got a unit that had the DSI feature. DSI, aka "Down Scan Imaging", allows for a better 3D view of the ocean floor. So, during the Spring cinder worm emergence in Newport, I was constantly switching from screen to screen wondering why the Down Scan Imaging feature wasn't working properly. I finally found a screen that I could read, but I was still irked at the DSI issue.
    The next day on Facebook, I had asked a fellow Hobie owner (and good friend), why the DSI feature wasn't working properly. He said in order for that feature to work, the transducer unit has to be in the water.
    I mentioned that my Hobie doesn't have that fancy transducer plate in the bottom of the hull. He said it could be mounted externally on an arm.
 
    I stopped in at Three Belles Outfitters in Niantic,CT to ask Shawn Pagano (Repairs Manager) about an external transducer mount for my older Hobie. He showed me the accessories that Yak Attack now makes for kayaks that don't an transducer plate.

    So, here's what I picked up:

    ( 1 ) Yak Attack Switchblade Transducer Arm


Photo #1 Credit: Jeff Hall

    ( 1 ) Yak Attack Gear Track - Top Loading #GTTL 109 


Photo #2 Credit: Jeff Hall


    I will admit that I thought the directions for the installation were pretty vague, but the illustration on the instruction pamphlet gives you an idea on what it's supposed to look like.


Photo #3 Credit: Jeff Hall


    Before I start anything, I wanted to make an "plate" for the gear track to give it a better grip on the kayak's surface. I have lots of scrap plate aluminum from the beat up road signs that I bought at a local flea market. I cut a small piece of plate making it a quarter inch bigger than the gear track.


One of many road signs that I got at a local flea market for $10 each.

Photo #4 Credit: Jeff Hall


I used a high speed drill with a grinding disc to take off the sharp edges on this backing plate I made. 

Photo #5 Credit: Jeff Hall


    While the above photo already shows the plate with the holes in it, the next photo will show you how I drilled all the holes perfectly with each one aligned properly.


In the photo above, I used an adjustable locking clamp to hold the gear track on top of the backing plate. Then, I drilled all three holes into the plate so everything is aligned up.

Photo Credit #6: Jeff Hall


    I chose a spot on the left, just in front of the left rod holder, to place my gear track. I wore a pair of mechanical gloves and held the gear track in place while I drilled the holes for the bolts. After the first hole was drilled, I put a bolt in place to hold it steady. I did the same for the other two holes.

Photo #7 Credit: Jeff Hall


Before I mount the gear track, I placed a small O-ring on each bolt before attaching the backing plate. The bolts are placed thru the track and the O-rings are on the bottom of the track. When the bolts are placed into holes, the O-rings will provide a waterproof barrier between the outer hull and the hull's interior.

Photo #8 Credit: Jeff Hall


* Note for Hobie owners: When you go to attach the backing plate, be very careful you don't get the rudder line caught on the plate. This part will be tricky.
If you don't own a Hobie, then you won't have to worry about this part.

Photos #9 & #10 Credit: Jeff Hall


In the photo above, I installed the arm lock onto the track and tightened the knob at the bottom. Next, I inserted the arm into the arm lock and adjusted the tightness of the lock. The arm is snug, but not too tight that I can't move the arm up and out of the way. The grooves on the arm allow it to be locked onto the arm lock to prevent it from slipping out.

Photo#11 Credit: Jeff Hall 


Starting at the base of the arm, I connected the transducer to the arm, and secured the cable to the front of the arm using the black cable ties provided. I used an extra cable tie (white) to keep the cable tight against the arm.


Photos #12 & 13 Credit: Jeff Hall


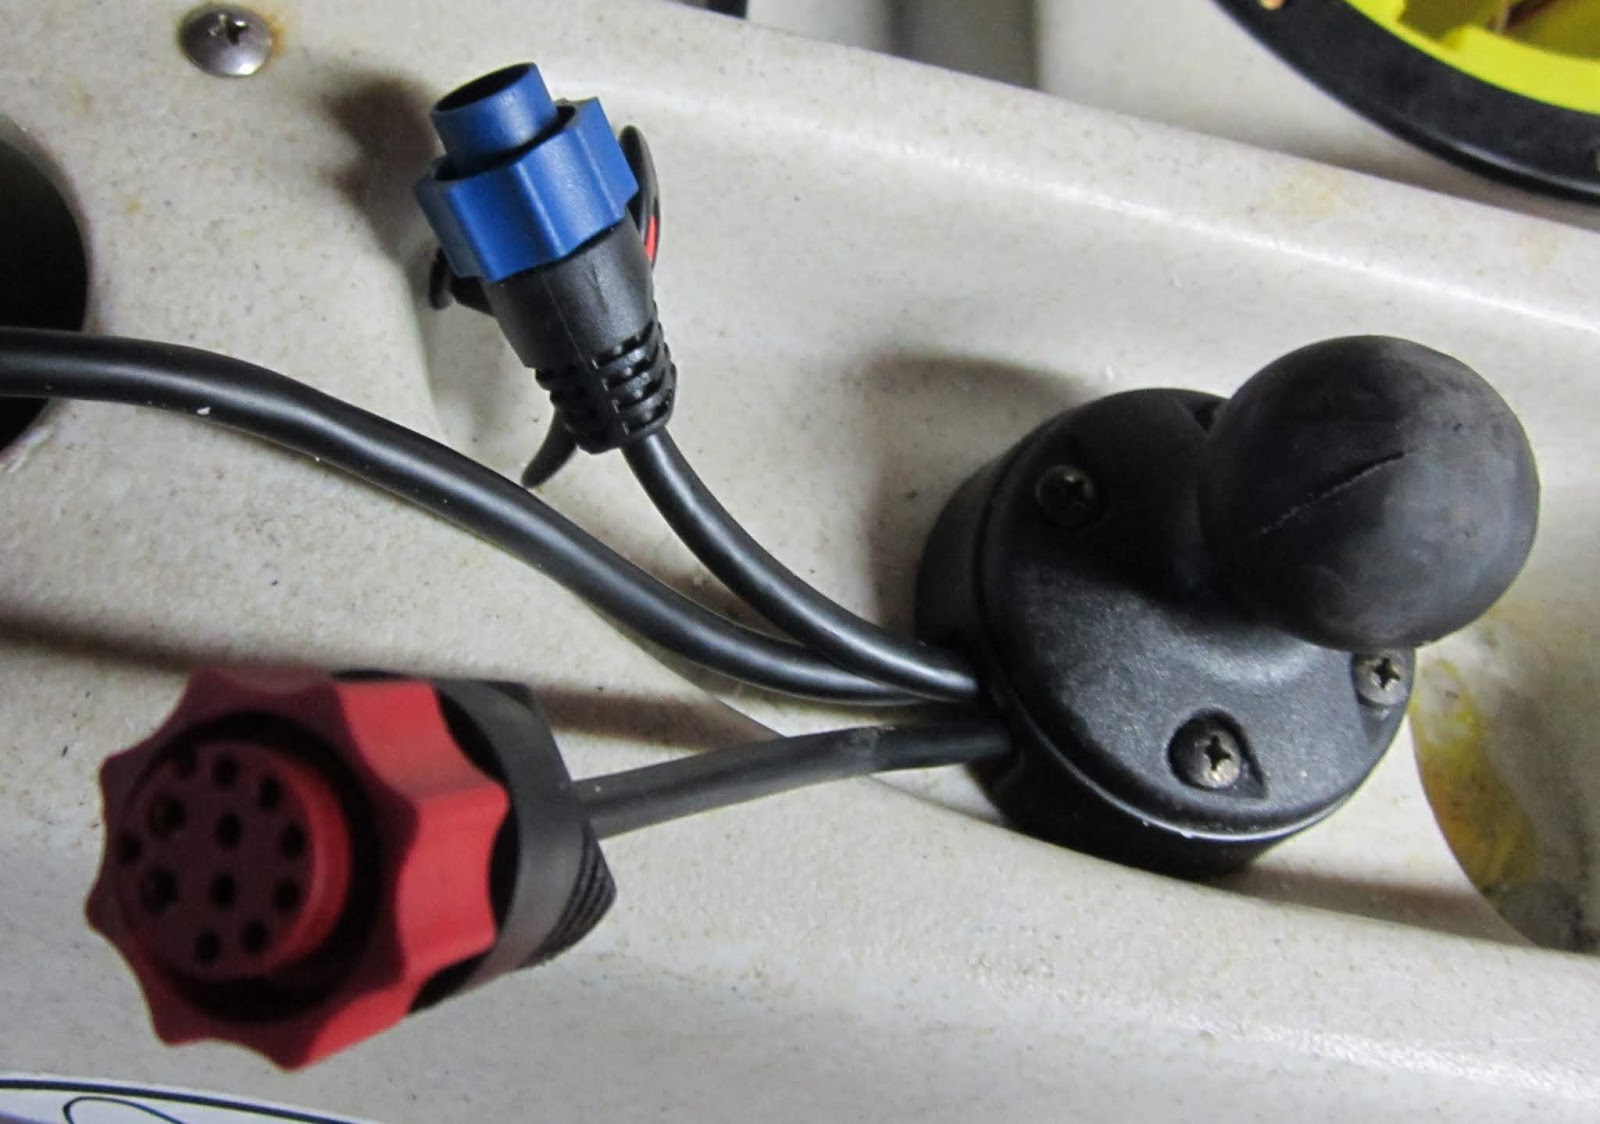
I found a good spot on my Hobie for the location of the Hook 5 by mounting it in the left storage tray, in front of the cup holder, but also 2" behind the rudder raise T-handle. I drilled a hole using a 1" diameter spade bit (save the shavings) so I can get the plug ends through. You may have to use a round file to slightly enlarge the hole's opening because the cable ends are over-sized. 
I fed the Blue cable in first, and then pushed the Blue plug back out. I used a piece of velcro to wrap up the excess blue cable. Going in through the center hatch of the Hobie, I fed the Red plug through the hole's opening, and left the remainder of the Red cable's wire in the hull, as it is powered by a small 12 volt battery inside the hull. Next, I adjusted the cable manager and proceeded to drill the holes for the RAM Mount base. Then, I tightened up the 4 bolts with the nuts provided. 

* Note: I used a RAM Mount "Cable Manager" to allow the cables to get in & out of the hull. The cable manager is roughly a 1/2" thick puck with a hole cut on one edge to allow the 1.25" diameter "Extreme Duty" RAM ball mount to be mounted on top of the cables. The holes for the ball mount's base will align with pre-drilled holes on the cable manager.

Photo #14 Credit: Jeff Hall


When finished, this is what the transducer arm looks like.


From the front, I wanted the arm to hang as far as it will go. The installation manual gives you the option of omitting one of the arms to make it smaller. But, I chose to keep the arm long, because I fish in saltwater. It still folds up and out of the way when beaching it, as well as transporting.


The Hobie sits on top of my second kayak, a 2013 Feelfree Moken 14. This angle shows you how far down the arm will actually reach. With this new method, I can now get the correct water temperature, and best of all, use the 3D qualities of the Down Scan Imaging system.

Photos #15 & #16 Credit: Jeff Hall


Hope this helps you in your decision to add a transducer arm for your fish finder whether it's a Sit-On-Top kayak, or a sit-inside kayak, it's time to unlock those secrets down below!

As usual, keep those lines wet & tight! - J


Saturday, June 23, 2018

Keep Yourself Alive

    Every year, usually in the early Spring, I always hear, or read, about someone going out in a kayak and flipping it, only to wind up dead because they couldn't back on, or in, their kayak. Here are some examples from the last few years:


    This is especially true here in Connecticut where we have fatalities every year involving kayaks. Some are by careless people who take huge risks by overestimating their own capabilities. Worst of all, some didn't bother to wear a life vest, and some had a life vest with them but chose not to wear it!
    It almost begs the question, when will we have more stringent rules regarding kayak & paddle craft safety measures put into place? Or better yet, when are people going to care? Here in Connecticut: "It is a state law to wear a life jacket while on a paddle craft from October 1 through May 31."
    This is should be mandatory all year long! I've actually heard a few Park Rangers tell me, "That you do not need a life vest/jacket from Memorial Day thru Labor Day." I respond by saying, "Are you people insane??? Those are the busy times of the year for boaters and/or fishermen!!!! These big boat guys don't care about our kayaks in the water!" The Park Rangers then tell me, "It's an option, sir." 
    Let's be serious here, why would ANYBODY tell someone that??? Especially when the Marine Patrol agents are busy with their safety checks asking to see if you have enough life jackets for everyone aboard your vessel. Or, as with the Coast Guard, checking to see if you're wearing your life vest. Why should it be just one agency, the US Coast Guard, that maintains that this should be mandatory all the time? The Marine Patrol should be doing the same as well - for the entire year!
    
    Whenever I go out, whether it's just a casual paddle, or if I'm fully rigged up and ready to go, I'm always ready for safety - life vest is on, marine radio is fully charged, safety mast with flag is up, and the rescue rope is tethered on my left side. Because you never know when you're going to flip over. I rolled a few years ago. It's one of those things where you're thinking, "....Oh, that'll never happen to me...." Guess what? Mother Nature was being cranky that day. Between the windy conditions (25 mph gusts), the big swells (3-4 ft rollers), and operator errors, I found myself in a situation that I couldn't avoid getting out of. I thought I could save myself from getting rolled, but it didn't work out the way I wanted it to, and over I went.
    I thought to myself, I'll just call for help using my marine radio, which is waterproof, but then I realized that I was the ONLY one in our group that was smart enough to actually have one and use it. What a waste! Four of us launched and I was the only person that carried a radio that day. I have a whistle attached to the zipper on my life vest, but would anybody even hear me?

    Here are just some of the ways to keep yourself alive out on the water:

1.) Tell someone where you're going.
    It never hurts to tell someone where you're going. You can always call if you're going to be late. If no one hears from you, after a day or two, then they can call the authorities.

2.) Place your cell phone in a waterproof bag.
    If you don't want your cell phone to turn into a pocket heater, then get yourself a good waterproof bag. Be sure to put it in "Airplane" mode to help conserve power. Just remember to turn off the "Airplane" mode when you need to use it.

3.) Buy a quality waterproof marine radio.
    While there are lots of radios on the market that have long range capabilities, you will need to invest in a quality, waterproof, marine radio. I carry a Standard Horizon HX-130 Marine Radio. It also has 10 Weather (WX) Channels and can transmit in either 1/3/or 5 watts.

4.) WEAR YOUR LIFE VEST!
    This one item alone should be a "no brainer". Wearing it could, or will, save your life - hence the term, a "vest" that saves your "life"! Depending on your kayak's seat, you will need to find a life vest that doesn't interfere with your seat's height. Make sure that the life vest's flotation area, on the back of your shoulders, is above the top of your seat. I realize that there will some days where the temperature outside will be unbearable. Don't take chances! If it's a nice day out, the boat traffic will be busy. Most boaters will be respectful, and steer clear of you. While other boaters may be careless and harassing at times.

5.) Use a Safety Mast with Orange Flag.
    On another blog post from a few years ago, I wrote about how you can make your safety mast with an orange flag. And, for those of you that fish at night, or in the early morning fog, you can add a white light to the top as well. Paddling in saltwater can be iffy at times. The constant tidal currents, swells created by other motor boaters, and the wind/weather can factor in many difficulties that one must deal with while out and about on the water. With an orange flag mounted behind your seat, you're increasing your chances of NOT being struck by another motor boater. Wearing bright colored clothing is a huge plus as well.

6.) Have a "Rescue Rope" with you.
    While most of us aren't expecting to experience a kayak flipping over, you need to plan on how you intend on righting your kayak, should this ever happen in the future. I have what's called a "Rescue Rope" attached to the left handle of my kayak. It's made from 550 Paracord that's been doubled up to 1100 lb strength with XL carabiners at each end. This will allow me to flip my kayak right-side up in a matter of seconds - instead of several minutes, or worse, not at all. While the kayak is upside down, I simply unclip one of the carabiners and toss it over the hull of the kayak. I then float over to the side that has the rope hanging, and proceed to climb on top of the kayak. By grasping the rope tightly, I throw myself backward into the water again, this will force the kayak to re-right itself in a hurry. If you're in a group, you can radio for help, and maybe some members of your group can assist in helping you get back into your kayak. Or, you can re-enter the kayak the old fashioned way by using this method here:


The video above was done by my good friend Walt Lariscy - a pioneer in the sport of kayak fishing and safety. 

* NOTE: I watched his video at least 20 times. Watch it. Learn it. Remember it.
Trust me, this video will SAVE YOUR LIFE SOMEDAY! I reached out to Walt on YouTube after my rollover, and thanked him for this video. It works!

    These are a few of the things every kayaker, or kayak angler, should carry with them at all times while out on any body of water.

As usual, keep those lines wet & tight! - J

Tuesday, May 29, 2018

It takes a Village.......

    If you're wondering what this month's blog is about, then let's go back a few months.....

    During the "New England Saltwater Show 2018" in Providence,RI earlier this year, both myself and RISAA Kayak member Mona Rodriguez, would arrive an hour early and walk the convention center to look over the other vendor's displays before the crowd came in.
 
    For the past 14 years, our fishing club the "Rhode Island Saltwater Anglers Association" (RISAA), has been putting on the "New England Saltwater Show" with the help our club's members as staff. We would do this on a volunteer basis - meaning we are not paid to staff the show, or the booths in the show. RISAA has many different "committees" that may cater to the saltwater enthusiast that may have more than one passion. The club's cost is $50 a year to join RISAA. Then, if you want to sign up with the Surfcasting Committee, then you would be directed to that committee's chairperson at no additional cost to you. There is also the Kayak Committee, Fly Fishing Committee, Tournaments Committee, Charter Trips Committee, etc.. All in all, it is one of the largest saltwater fishing clubs in the USA.

    Anyway, while Mona & I were walking around the convention center, we came across this guy that represents a charter company called "Veteran Angler Charters". VA Charters, Inc. offers no-cost charter fishing trips to disabled veterans of all branches of the armed forces, providing our troops with recreational rehabilitation and therapeutic support. His name was Capt. Randy Bagwell. We stopped by to say "hi", and we got to talking about signing up for a free charter. We told him we were two booths down, on the same side, in RISAA's Kayak Committee booth. Then, he mentions he knows a young man named Kevin DuBois, that expressed his dream of entering a kayak fishing tournament. There was a one catch though, Kevin lost his legs at the hip from an IED, a Improvised Explosive Device.

    As it turned out, my friend Mona had an older Hobie Outback that needed a little work. She had gotten it for free, from another Kayak Committee member (Bob Oberg), that already had a newer Outback and no longer needed the old one. Anyway, Bob told us it needed new rudder lines to make it work properly. As well as, a new rudder lift line. The rudder just lifts up, unlike the newer "twist & stow" rudder that flips up and out of the way. Well, we started to look for a shop that would be willing to do the work for an affordable price (something we can afford).

    Enter the ring, shop #1: Megrew's Boats, Hobie Dealer, Charlestown,RI
I knew this shop well because it's located on Route 1, and it's near a few places I like to fish at, Quonchonataug Breachway, Ninigret Pond, and Charlestown Breachway. So, we approach the owner with our dilemma, and we had the said kayak in tow. She took a quick look at it, it told us we should just scrap it, and get a new kayak - that it wasn't worth the headache of replacing the lines. I've dealt with this woman before, and she can be very bullheaded. The store has just about every accessory you can imagine, and it's always well stocked. If you're willing to "brag" about your product (Hobie), you'd better be able to handle a simple fix like this. So, shop #1 was crossed off the help list.

    Enter shop #2: Collinsville Canoe & Kayak, Hobie Dealer, Collinsville,CT
This is the very same shop I bought my Hobie Outback at. It's located right on the Farmington River in Collinsville,CT. We asked for the repairs department, and out comes their "tech/repairs" guy. We told him what needs to be done, and informed him that we already purchased the lines. As like before, he gives the kayak a quick look from top to bottom, and "throws out" a repair estimate - $250. I won't lie, I nearly crapped my pants when he said the repair would take two hours! He also noticed a "crack" on the underside of the hull. Former owner, Bob told us he had the hull pressure tested, and that it did not leak. But, "Tech Guy" bragged about his 1200 watt plastic welder, and wouldn't even attempt that repair (hull's underside). I told "Tech Guy" that my $20 80 watt plastic welder can do it,  AND I won't charge Kevin a dime to do it! And so, shop #2 was crossed off the help list as well.


Three Belles Marina is an authorized Hobie kayak dealer.

Photo Credit #1: Lindsay Amherst

    Enter shop #3: Three Belles Marina, Hobie Dealer, Niantic,CT
Mona was getting discouraged about the kayak's repairs, wondering if it was even worth repairing at all. I told her I know a shop that may be able to help - enter, "Three Belles Marina" located in Niantic,CT on the Niantic River. A full service marina, and an authorized Hobie Dealer. We drove down with the kayak in the back of my truck, and met with John Van Ness, Tao, Yanni, and Shawn Pagano. As we were explaining what needed to be done, Tao, Yanni, and Shawn had begun lubricating the stainless steel parts, O-ringed hatch seals, and other working mechanisms. We brought the lines with us, and explained that Mona wanted to donate this kayak to a wounded retired US Marine veteran, that had no idea that we were donating the kayak to him. We also mentioned Randy Bagwell, and got him on the phone, so he could explain Kevin's aspirations for entering a kayak fishing tournament. But, best of all, it would be done in a Hobie - one that the shop would be mentioned in! Believe it or not, Three Belles Outfitters said YES, they will do the work!!!


Kevin DuBois, and his wife Kayla DuBois arrive at Three Belles Marina.

Photo Credit #2: Lindsay Amherst


From left to right: Kayla Dubois, Kevin DuBois, Jeff Hall, Mona Rodriguez, Thomas Houde, Capt. Randy Bagwell, Shawn Pagano, and John Van Ness. Kevin sees his new ride and is literally speechless.

Photo Credit #3: Lindsay Amherst


Shawn Pagano, service manager at TBO, thanks Kevin for his service.

Photo Credit #4: Lindsay Amherst


John Van Ness, floor manager at TBO, thanks Kevin for his service.

Photo Credit #5: Lindsay Amherst


Pictured from left to right: John Van Ness, Jeff Hall, Mona Rodriguez, Thomas Houde, Capt. Randall Bagwell, Shawn Pagano, Kevin DuBois, 
and Kayla DuBois 

Photo Credit #6: Lindsay Amherst


Kevin, and his wife Kayla, along with USMC photographer Lindsay Amherst, who took most of these photos.

Photo Credit #7: Capt. Randall Bagwell


John Van Ness applies a "Three Belles Outfitters" vinyl decal on the right side of Kevin's Hobie Outback.

Photo Credit #8: Lindsay Amherst


Jeff Hall and Mona Rodriguez explain to Kevin and Kayla the best way on how to transport the kayak in the back of the pickup truck with the tailgate down. Jeff explained that he uses ratchet-style straps to secure the kayak upside down in the truck's bed, while a second ratchet-style strap keeps the kayak from moving side to side when taking corners.

Photo Credit #9: Lindsay Amherst


Shawn Pagano, USMC veteran Kevin DuBois, and his wife Kayla DuBois outside Three Belles Outfitters with his very own Hobie Outback kayak that was possible from the generous donations of people that care.

On behalf of "Kayak Fishing Country", I personally want to say, "Thank you All, for your service!" - USMC Kevin DuBois, USMC Lindsay Amherst, US Army Thomas Houde, USMC Daniel Whited, and US Navy Randall Bagwell  

Photo Credit #10: Lindsay Amherst


    From Three Belles Marina's Facebook page:
US Marine Corporal Kevin Dubois was on his second deployment when he lost both of his legs at the hip after stepping on an improvised explosive device (IED) in Helmand Province, Afghanistan on July 31, 2011. Four days later, he woke up in Bethesda MD, where he learned from his wife, Kayla, and from his doctors that the massive IED blast had taken his legs. During the helicopter evacuation to a NATO trauma center, medics pumped 14 units of blood into Dubois (more than a typical human body contains) just to keep him breathing. After his injury, Kevin was moved to the Navy Medical Center San Diego where they lived while he did his extensive rehabilitation. Kevin and Kayla have since moved back home to Rhode Island. We received a phone call from Mona Rodriguez, who had a Hobie kayak to donate to getting Kevin on the water to fish from a kayak. Thomas Houde, who fishes for TBO Fishing, suggested Mona get in touch with us to see if we could help with some broken rudder lines and other rigging. Once we heard about what Kevin had been through serving our country we immediately offered our assistance, We donated a fish-finder install kit and all labor to complete the job. Through friends, and various organizations, all donated a fish-finder, new seat, a safety flag, a Hobie cart for transport, and a new PFD. It was great to meet Kevin and his friends. We are looking forward to seeing him get into some fish in the near future, and we are truly honored to have been a part of this. 

    From Randy's Facebook page, he had this to say:
Saturday, May 5, 2018, What a day... My bud USMC Kevin Dubois was recently at a benefit and buying raffle tickets for a kayak. I thought... "I got 2 legs and I can't kayak"... let me see what I can do. Mona Rodriguez graciously donated a kayak that was outfitted by the amazing guys at Three Belles Marina (Tom, John, and Shawn), which was presented to Kevin today. Other donations included a Helix 7 Hummingbird GPS fish finder from Hummingbird, an inflatable life preserver from West Marine, and additional donations from USMC vets Daniel Whited and Lindsay Amherst. It takes a village, give the fish some hell Kevin! Kayla Eva Dubois you're next!

Sunday, May 6, 2018,  As I said yesterday, "it takes a village", there are a lot of people and businesses to thank in making it happen. In February, I found out that my bud, USMC Kevin Dubois, was looking for a kayak because he said his kayak was destroyed by the last snowstorm. So, I started asking around and made a call to Army Vet, Thomas Houde, who is a big saltwater kayak fisherman. So, he put out his feelers. Then, at the RISAA fishing show, I met Mona Rodriguez just two booths down who was promoting "RISAA's Kayak Committee". I told her the story of Kevin, and that I needed a kayak, she said, "I have a used one that I could donate." Well, I really wanted a new from one of the big manufacturers, but I'm not a kayak fisherman, so I was striking out. Sunday, at the show, I told Mona I would take the kayak, and pick it up during the week. She said, "...well, it will need a little work...." And, that's where the village started to grow. 
    Mona Rodriguez and Jeff Hall took the kayak to Three Belles Marina and the crew Shawn Pagano and John Van Ness. After hearing the story of Kevin from Mona, the crew said, "We got this. We will go through it, and make like brand new, at no cost." We would just have to buy any equipment and/or parts, Well, that's when I went out asking for favors, I reached out to Captain BJ Silvia, a Pro staff member for Humminbird and Bill Carson, also from Humminbird. The next thing I know, BJ Silvia is calling, saying that they are providing Kevin with a Helix 7 DSI Gen 2 Fish finder/Sonar w/Down Scan Imaging/GPS. I stopped by West Marine, and asked for an auto-inflatable life jacket, and they gave me one. The only thing it needed was a seat. So, I asked the members of "Aquidneck Island Striper Team", to purchase the seat. The delay in delivering the kayak, was a mount for the Humminbird that was on back order, so a co-worker, and USMC vet Daniel Whited, asked for the part number and said, "it will be here by Friday", and he covered the cost. Then, I asked co-worker, and USMC vet Lindsay Amherst, if she would take a ride, and when we present it to Kevin, to take pictures. When she found out that the one item missing was the safety flag with light, as one Marine helping another Marine, she bought that - and it completed the delivery. 
     Again, it takes a village. I just wanted to make sure I thanked everyone involved for making it happen. A big shout out to Al Gag, who is providing Kevin with the best lures made for saltwater action. I just don't know if Kevin has the right rod and reel, but I bet I can find it, if needed. Thanks to a village!

    With that said, I told Kevin that I was working on a special tri-color "Gear Crate", made just for him. Leaked a few photos for him, and Kayla, about the "very patriotic" gear crate. Kayla asked me how much I usually charge for a custom gear crate, I told her, "this one's on me." Normally, I charge about $75, because my crates are all brand new with no labels stamped on the sides. These aren't "permanently borrowed" or "stolen". Mona reached out to some friends in Alaska, and they sent a 7.5' saltwater rod and reel combo, which Kevin has already received. Here's a pic of the "Patriotic Gear Crate" I just completed.


The author standing with a tri-color gear crate for a retired wounded USMC vet.

Photo Credit #11: Mona Rodriguez

All things aside, it was a great day hanging out with the guys at Three Belles Marina, and we finally got to meet Kevin & Kayla Eva DuBois!

*Note: This Hobie came with a footwell plug and a Mirage Drive Pedal System. Kevin has a few ideas on modifying the foot pedal system, and turning it into a hand powered system, by adding some extension arms that are similar to what you'd use at a gym on a elliptical ski machine. Stay tuned for a possible "Part 2" to this story!

Until then, keep those lines wet & tight! - J